Screenshots, text, annotations and recordings, step by step.
Getting started
Install
Open the disk image you downloaded and drag AEShot Capture to the Applications folder.
Run the installer you downloaded. It installs AEShot Capture for your account, without administrator rights, and adds it to the Start menu.
Choose the package for your Linux under Download on the AEShot Capture page and install it with the command shown there.
If Edge or Windows warns because the installer isn’t code-signed yet, here is what to do.
First launch
The welcome window walks you through the Screen Recording permission, the shortcuts and where to find the app. Click Get Started when you are done.
The welcome window shows the shortcuts and where to find the app. Click Get Started when you are done.
The welcome window shows the shortcuts and where to find the app, and can start AEShot Capture when you sign in. Click Get Started when you are done.
Permissions
AEShot Capture needs Screen Recording: allow it, turn on AEShot Capture in System Settings › Privacy & Security › Screen Recording, then click Restart AEShot Capture. Auto-Scroll needs Accessibility, keystrokes in recordings need Input Monitoring, and the camera and microphone are asked for when you first use them. Settings › Permissions shows them all.
Screenshots need no permission on Windows. Settings › Privacy shows whether recordings may use the camera and microphone; you change that in Windows Settings › Privacy & security.
On KDE Plasma, screenshots need no permission; other desktops ask what to share. To show clicks and keystrokes in recordings, add yourself to the input group with sudo usermod -aG input $USER, then sign out and in again. Settings › Privacy shows the status.
Where to find it
AEShot Capture lives in the menu bar: click its viewfinder icon for every capture mode, the editor and Settings. It has no Dock icon.
AEShot Capture lives in the notification area next to the clock: click its icon for every capture mode, the editor and Settings. If Windows hides it under the ^ arrow, drag it onto the taskbar.
AEShot Capture lives in the system tray next to the clock: click its icon for every capture mode, the editor and Settings. If Plasma hides it under the arrow, right-click the arrow, choose Configure System Tray and set AEShot Capture to Always shown under Entries.
Updates
AEShot Capture looks for a new version about a minute after it starts, then once a day. When one is out, a window shows what’s new. Click Update: it downloads the update, checks its signature, installs it and opens again, and your settings stay. A critical update reminds you until it’s installed. To look now, choose Check for Updates… in the AEShot Capture menu, under About AEShot Capture, or in its menu bar menu, or click Check Now in Settings › General › Updates, which also has Check for updates automatically.
AEShot Capture looks for a new version about a minute after it starts, then every hour. When one is out, a window shows what’s new. Click Update: it downloads the update, checks its signature, installs it and opens again, and your settings stay. A critical update reminds you until it’s installed. To look now, choose Check for Updates… in the menu of its icon in the notification area, next to About AEShot Capture, or click Check Now in Settings › General › Updates, which also has Check for updates automatically.
On Linux, AEShot Capture looks for a new version about a minute after it starts, then once a day. When one is out, a window shows what’s new. Click Update: it downloads the update, checks its signature, installs it with your system’s package manager (apt, dnf, zypper or pacman) after asking for your password, and opens again; your settings stay. A critical update reminds you until it’s installed. To look now, choose Check for Updates… in its tray menu, or click Check Now in Settings › General › Updates, which also has Check for updates automatically. A copy not installed from the packages on aeshot.com only shows Download. Versions before 1.2.3 can’t do this yet: install the newer package from the AEShot Capture page once.
Installation ID and reviews
Settings › General shows this installation’s Installation ID with Copy, and Write a Review on aeshot.com opens the review page with it filled in. Reviews need Count this installation turned on. You can also choose Write a Review… in the app’s menu. How reviews work
Step by step
Capture an area, a window or the screen
Everything starts from the AEShot Capture icon or a shortcut.
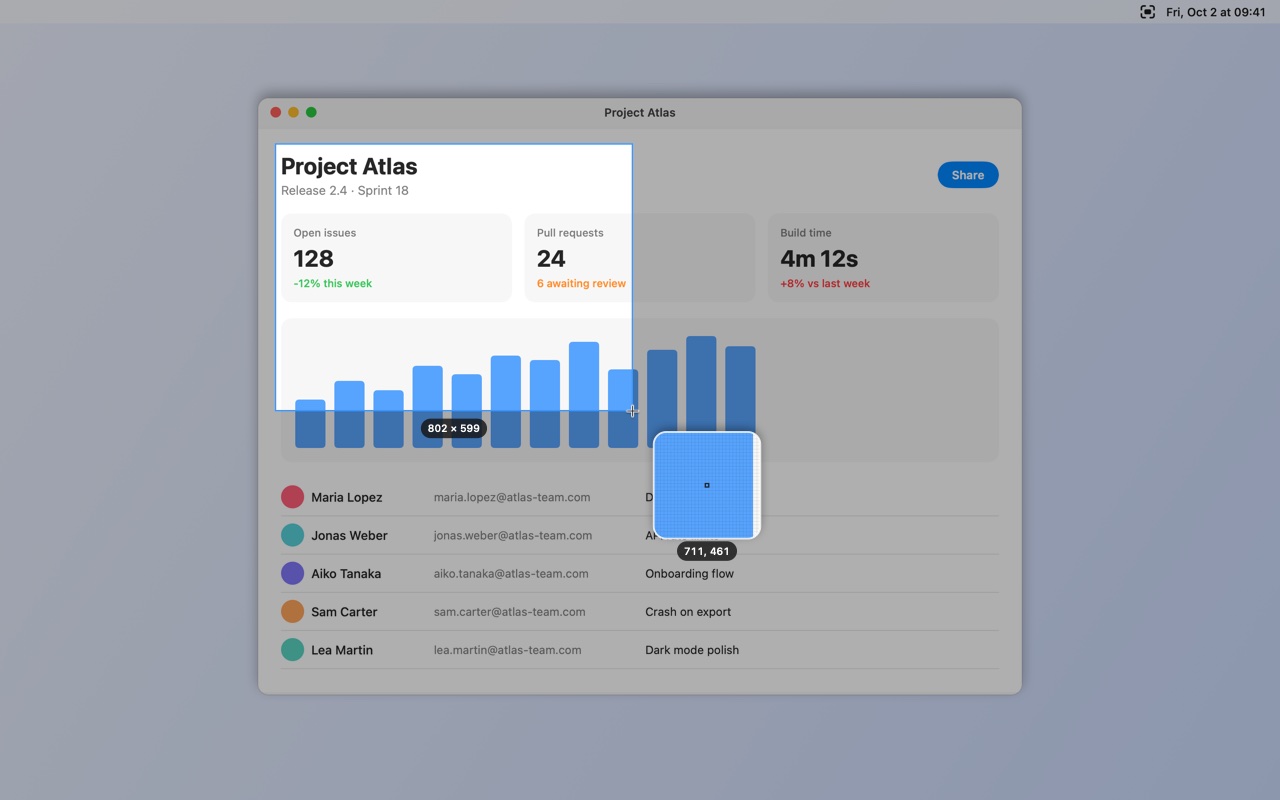
Click the AEShot Capture icon in the menu bar and choose Capture Area, Capture Window or Capture Fullscreen. Or press ⌥⇧⌘4, ⌥⇧⌘5 or ⌥⇧⌘3.
Click the AEShot Capture icon in the notification area and choose Capture Area, Capture Window or Capture Fullscreen. Or press Ctrl+Alt+Shift+4, 5 or 3.
Click the AEShot Capture icon in the system tray and choose Capture Area, Capture Window or Capture Fullscreen. On KDE Plasma, you can also press Ctrl+Alt+Shift+4, 5 or 3.
For an area, drag a rectangle. Hold Shift for a square, press Space to switch to window selection, or press Esc to cancel.
For a window, point at it and click. Capture Fullscreen takes the display under the pointer.
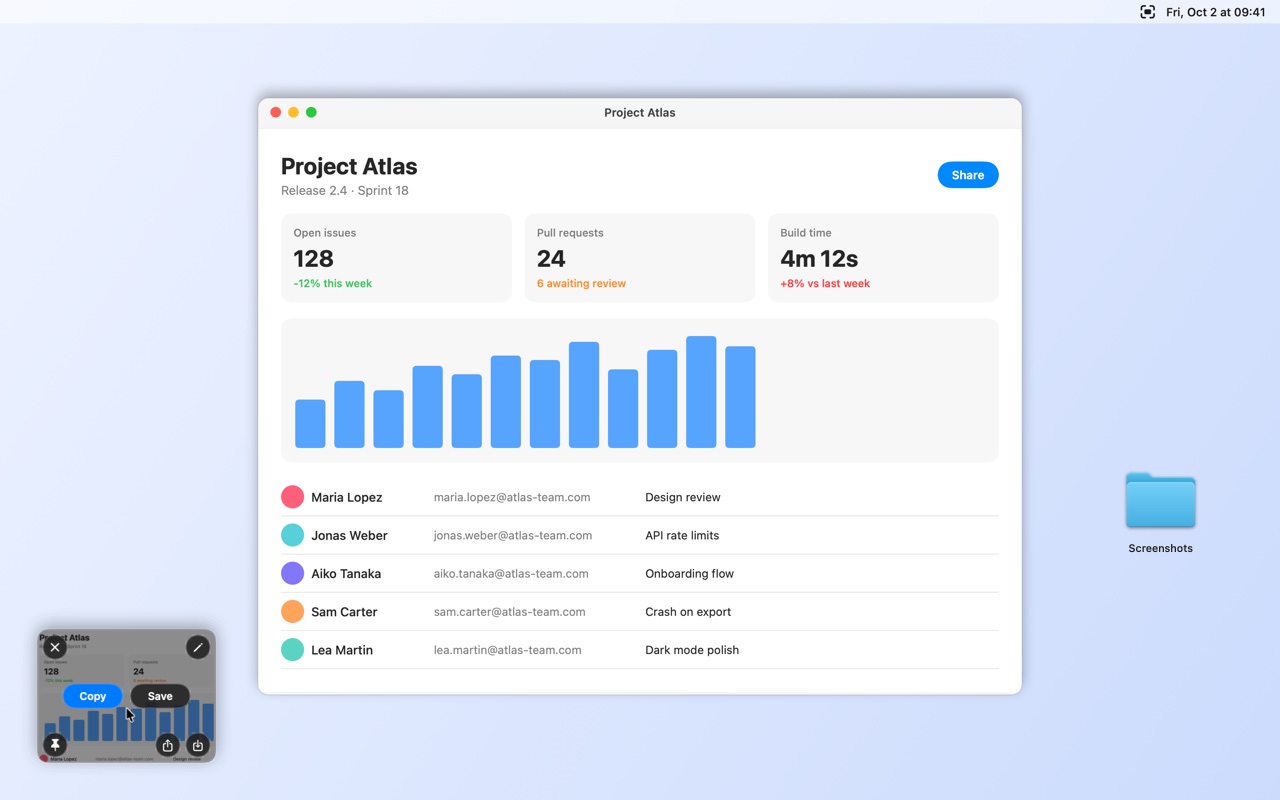
The capture is copied and its thumbnail appears in a corner of the screen. Settings › General › After capture decides what else happens.
To copy only, with no thumbnail and nothing saved, use Capture & Copy in the menu, or ⌃⌥⇧⌘4 for an area.
To copy only, with no thumbnail and nothing saved, use Capture & Copy in the menu.
Capture a long page
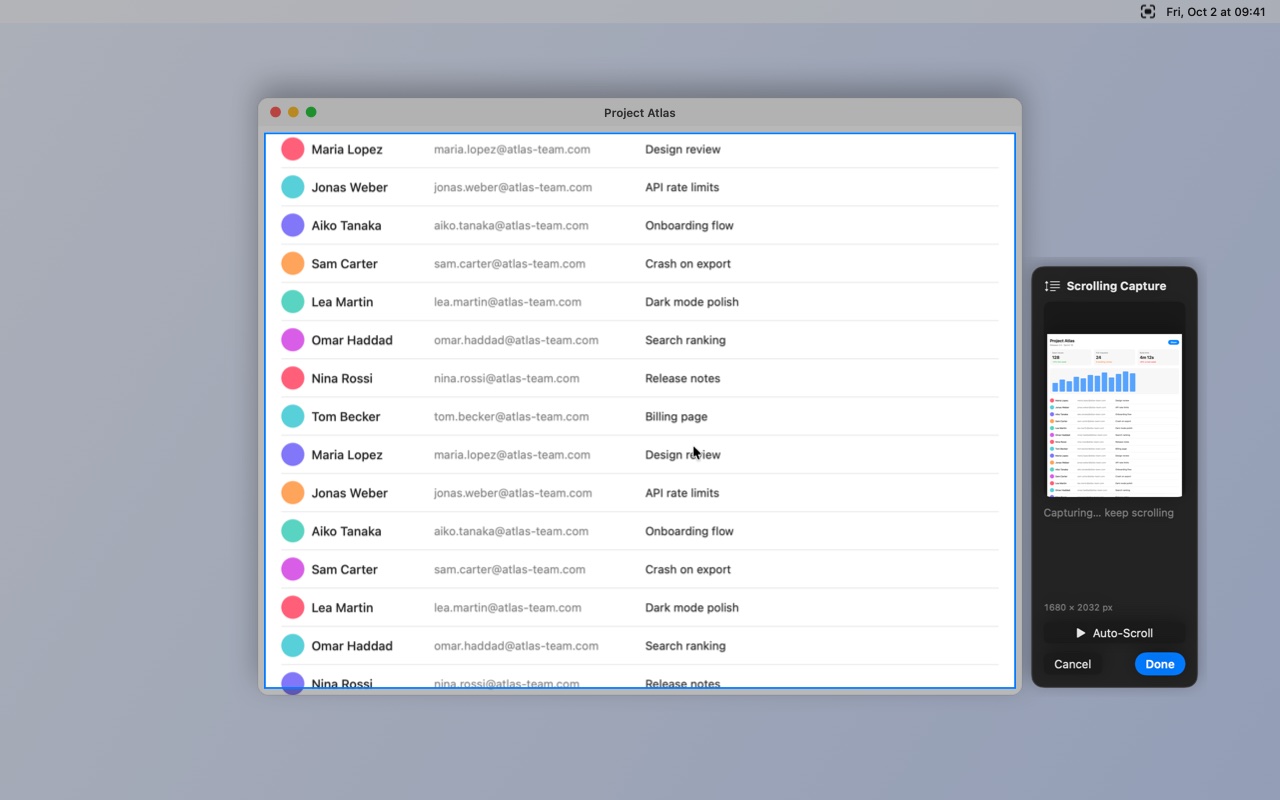
Scrolling Capture stitches a page that is taller than the screen into one picture.
Choose Scrolling Capture in the menu, or press ⌥⇧⌘6.
Choose Scrolling Capture in the menu, or press Ctrl+Alt+Shift+6.
Select the area to scroll.
Scroll down slowly. If AEShot Capture loses track, scroll back up a little.
Or press Auto-Scroll: it scrolls for you and stops at the end. The first time, allow AEShot Capture under Privacy & Security › Accessibility.
Or press Auto-Scroll: it scrolls for you and stops at the end.
Or press Auto-Scroll: it scrolls for you and stops at the end. On Wayland, KDE asks once whether to allow it.
Press Done.
Copy text from the screen
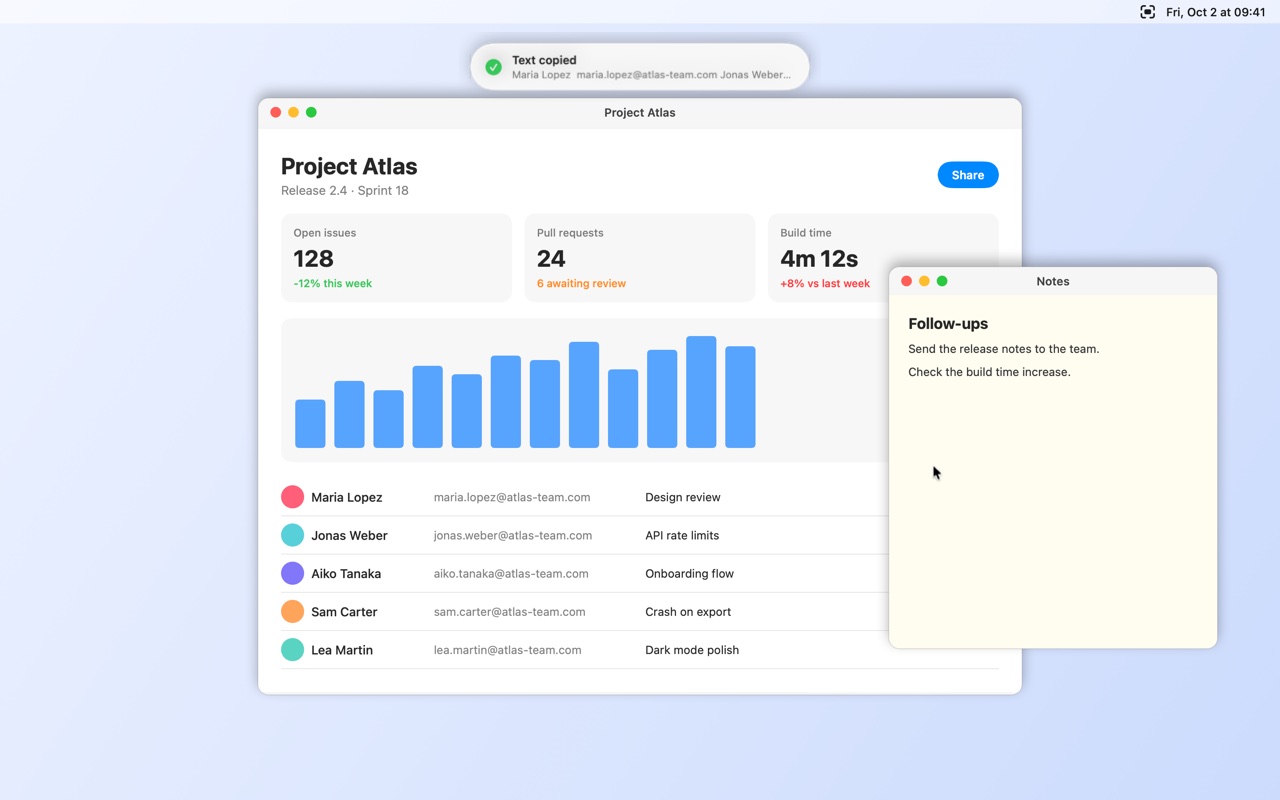
Capture Text reads the text in any part of the screen and copies it, even from pictures and videos.
Choose Capture Text (OCR) in the menu, or press ⌥⇧⌘2.
Choose Capture Text (OCR) in the menu, or press Ctrl+Alt+Shift+2.
Drag around the text, or click a window.
The text is recognized and copied. A QR code or a single link is copied too.
Paste it anywhere. The text is recognized on your Mac; nothing is sent anywhere.
Paste it anywhere. Windows recognizes the languages installed for your account; if there is none, add one in Settings › Time & language › Language & region.
Paste it anywhere. Capture Text needs Tesseract and the data for your language, for example the package tesseract-ocr-deu.
Mark up a screenshot
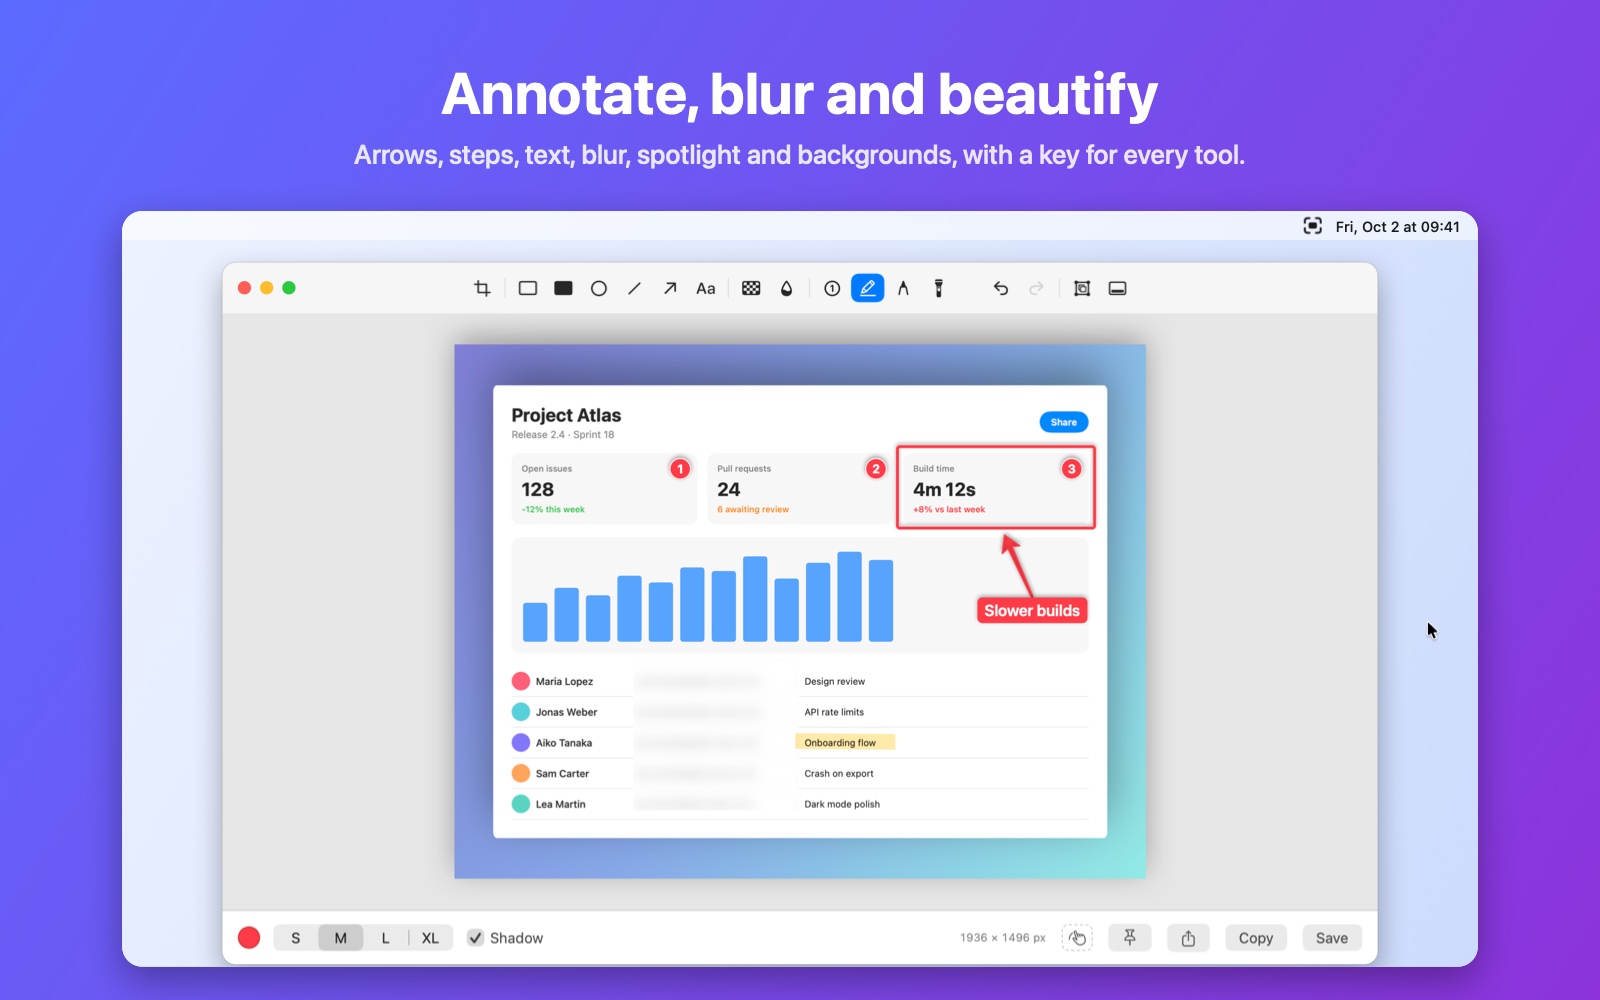
The editor has arrows, text, shapes, blur, numbered steps, a highlighter and backgrounds.
Hover the thumbnail and click Annotate, or choose Open Editor in the menu.
Pick a tool in the toolbar, or press its key: A for Arrow, T for Text, R for Rectangle, X to pixelate, B to blur, N for a counter, H for the highlighter, C to crop.
Choose a color and size, then drag on the picture.
Click Background to place the picture on a gradient or color, with padding and rounded corners.
Click Copy (⌘C) or Save (⌘S). ⌘Z undoes a step.
Click Copy (Ctrl+C) or Save (Ctrl+S). Ctrl+Z undoes a step.
Record the screen
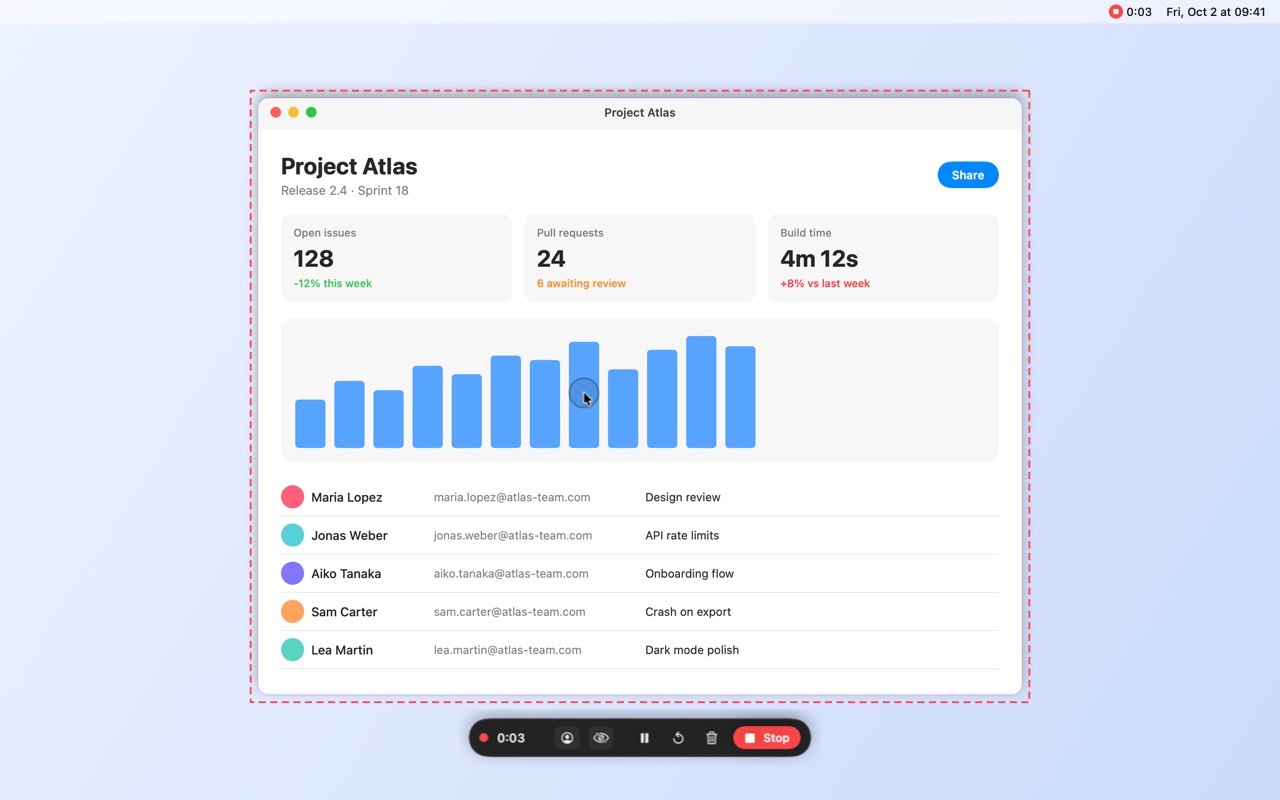
Record a video or a GIF, with sound, clicks, keystrokes and your camera if you like.
Choose Record Screen in the menu, or press ⌥⇧⌘7.
Choose Record Screen in the menu, or press Ctrl+Alt+Shift+7.
Select an area, press Space for a window, or click the desktop for the whole screen.
In the bar, choose video or GIF and turn on computer audio, the microphone, clicks, keystrokes or the camera.
Click Record.
To stop, click the red stop button in the menu bar, or Stop in the bar.
To stop, click the red AEShot Capture icon in the notification area, or Stop in the bar.
To stop, click the red AEShot Capture icon in the system tray, or Stop in the bar.
The thumbnail offers Edit Video to trim the recording, remove its sound or export it as a GIF.
Use the thumbnail
After each capture, Quick Access shows a thumbnail with everything you need next.
After a capture, the thumbnail appears in a bottom corner of the screen.
Hover it and click Copy or Save.
Its corners close it, share it, save it under a new name, open it to annotate, or pin it to the screen.
Or drag the thumbnail straight into another app.
Settings › Quick Access sets its corner and when it closes by itself.
Shortcuts
These are the default shortcuts. You can change every one of them.
Open Settings from the menu and choose Shortcuts.
Click a shortcut and press the new keys.
Click a shortcut and press the new keys. Esc cancels, Backspace clears.
Restore Defaults brings back the shortcuts below.
To use ⇧⌘3, ⇧⌘4 or ⇧⌘5, first turn off the macOS screenshot shortcuts in System Settings › Keyboard › Keyboard Shortcuts › Screenshots.
To use Print Screen, first turn off “Use the Print screen key to open screen capture” in Windows Settings › Accessibility › Keyboard, then assign it in AEShot Capture.
Shortcuts work on KDE Plasma. To use Print Screen there, first remove it from Spectacle in System Settings › Keyboard › Shortcuts, then assign it in AEShot Capture.
⌥⇧⌘4Capture Area
⌥⇧⌘5Capture Window
⌥⇧⌘3Capture Fullscreen
⌥⇧⌘6Scrolling Capture
⌥⇧⌘2Capture Text
⌥⇧⌘7Record Screen
Ctrl+Alt+Shift+4Capture Area
Ctrl+Alt+Shift+5Capture Window
Ctrl+Alt+Shift+3Capture Fullscreen
Ctrl+Alt+Shift+6Scrolling Capture
Ctrl+Alt+Shift+2Capture Text
Ctrl+Alt+Shift+7Record Screen
Questions
macOS asks again whether AEShot may record the screen.
macOS periodically asks you to confirm screen recording for every app that uses it. Choose Allow.
Where are my screenshots?
In the folder you chose the first time you saved. Settings › General shows it and lets you change it, and the menu of the AEShot Capture icon opens it.
In Pictures\AEShot, unless you chose another folder. Settings › General shows it and lets you change it, and Show Screenshots Folder in the menu opens it.
In Pictures/AEShot Capture in your home folder, unless you chose another folder. Settings › General shows it and lets you change it, and Show Screenshots Folder in the menu opens it.
Capture Text finds nothing.
Select a little more than the text itself, and make sure it is not too small on screen.
My recording has no sound.
Turn on computer audio or the microphone in the recording bar before pressing Record.
How do I uninstall it?
Choose Quit in the menu of the AEShot Capture icon, then move the app from the Applications folder to the Trash.
Uninstall AEShot Capture from the list of installed apps in Windows Settings. Your settings stay.
In the app’s container: ~/Library/Containers/com.ckyr.AEShot.
In %APPDATA%\AEShot. Recordings you have not saved are kept for a week in %LOCALAPPDATA%\AEShot\Recordings.
In ~/.config/AEShot Capture. Recordings you have not saved are kept for a week in ~/.local/share/AEShot Capture/Recordings.
What does it need to run?
macOS 14 or later, on Apple silicon or Intel. Recording the microphone needs macOS 15.
Windows 11, 64-bit.
64-bit Linux. KDE Plasma 6 is recommended; other desktops work through their portals. Capture Text needs Tesseract, recordings need GStreamer and PipeWire.
What about my privacy?
Your captures stay on your computer unless you share them. The privacy policy has the details.